New Web SMS 4.0
To Send SMS from the computer with New Web SMS 4.0 is as simple as before, but with more stability
The service is seamlessly integrated into our communication platform for sending SMS, surveys and marketing!
What is the difference between old and new Web SMS?
Web SMS has been a trusted go-to web service for communicating using SMS for over 15 years. Now we are launching a completely new version of Web SMS, based on modern web technology and with communication as the main focus. New Web SMS uses the same modern SMS engine as One Channel and One Survey and gives you the opportunity to quickly reach out with SMS to your customers, colleagues or members.
Below you will find an overview of basic functionality in the new Web SMS. Want a full review of the service? Press the help button in the right corner!
How do I send SMS in the new Web SMS?
If you have used the older version of Web SMS, you will probably recognize the interface with its classic "Send" field, which is still the hub of Web SMS 4.0.

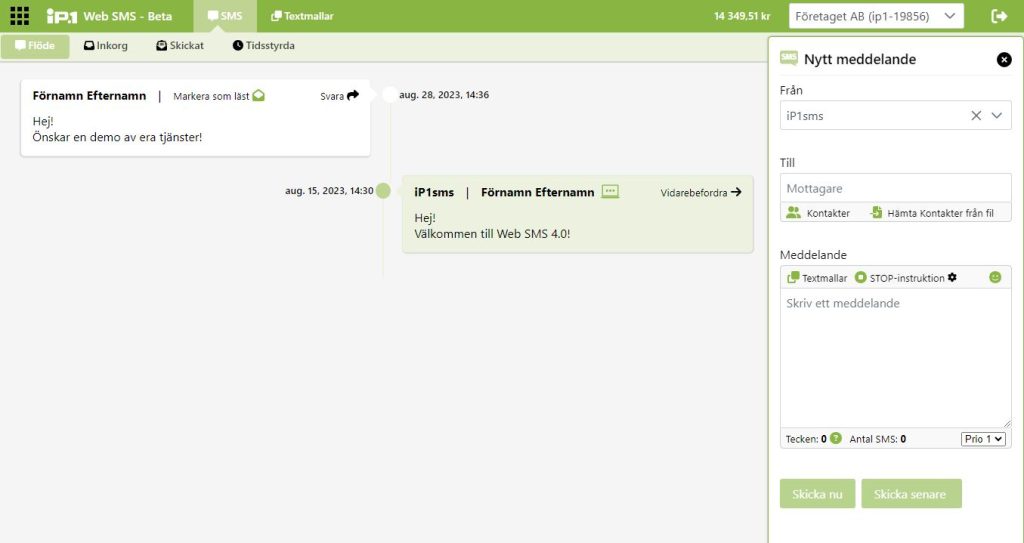
From field
Here you enter your sender, either a text, 3 – 11 characters, Aa – Zz, or a number, 0 – 9, 3 – 15 digits. By pulling down the drop-down menu, you can choose from among your previously registered senders.
To field
Here you enter the number you want to send to. If you want to search for an existing contact or label, you can type the name in the box and choose from the options that appear. If the number is not in the list, complete the number and click the suggestion that appears below to format the number correctly.
Contacts – Click on contacts to add individual contacts or labels from your contact list to the recipient list. Here you will also find quick shortcuts to importing contacts, as well as to your contact list where you can manage your contacts and labels.
Retrieve contacts from file - New Web SMS allows you to add contacts as recipients directly by uploading an excel file. In order for Web SMS to recognize mobile numbers, they need to be in a separate column with the heading "Phone". Not case sensitive.
The message field
Here you write your SMS message. An SMS requires 160 characters and you can always see how many characters you have written and how many SMS your message consists of at the bottom.
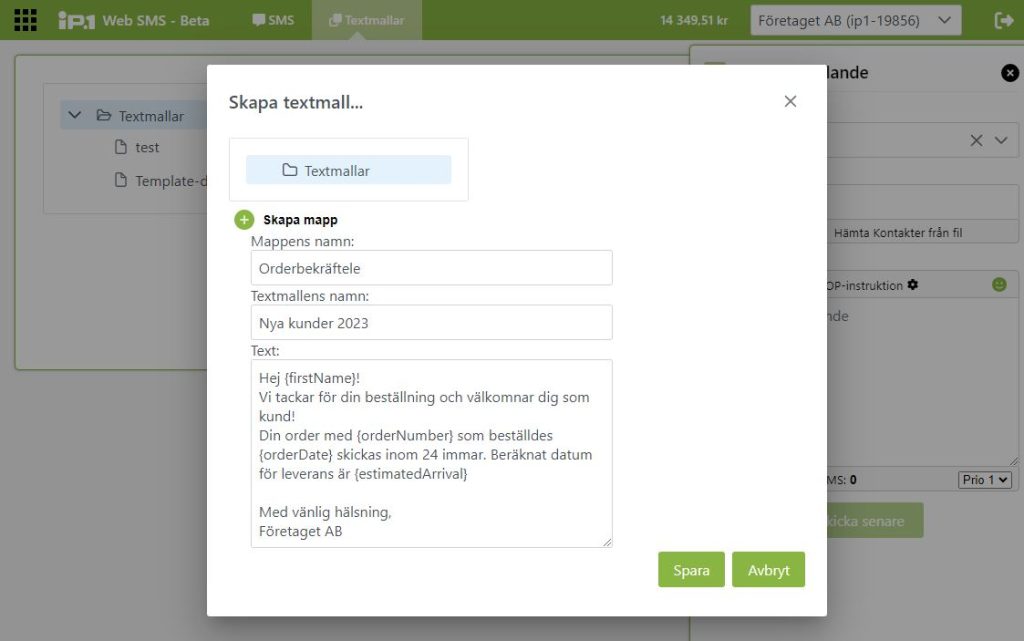
Text templates - By clicking on "Text templates" you open a dialog box that allows you to select and insert your ready-made text templates.
Stop instruction - Here you can insert your stop instruction, which will end up at the bottom of your message. the instruction will consist of a text string containing the {UnsubscribeUrl} variable. This variable will create a unique unsubscribe link for each recipient you send to. You can edit your stop instruction by clicking on the gear next to it. If you do not see the Stop instruction option, it means that you have not activated the additional service "Unsubscribe link" or you do not have a virtual number for incoming traffic.
How do I manage contacts in the new Web SMS?
One of the biggest changes in the new Web SMS is the connection to the new contact system. You can easily add contacts or labels to the recipient list directly in Web SMS through the integrated contact dialog. If you want to edit or manage your contacts, this is done in the separate contact app where you can also import contacts and segment them with labels. Labels replace groups that existed in the previous version of Web SMS.
You reach the Contacts app by clicking the app selector icon: ![]() which you'll find at the top left next to the iP.1 logo, or by clicking the contact button to open the contacts dialog: which you will find under the to field and then "Contact list".
which you'll find at the top left next to the iP.1 logo, or by clicking the contact button to open the contacts dialog: which you will find under the to field and then "Contact list".
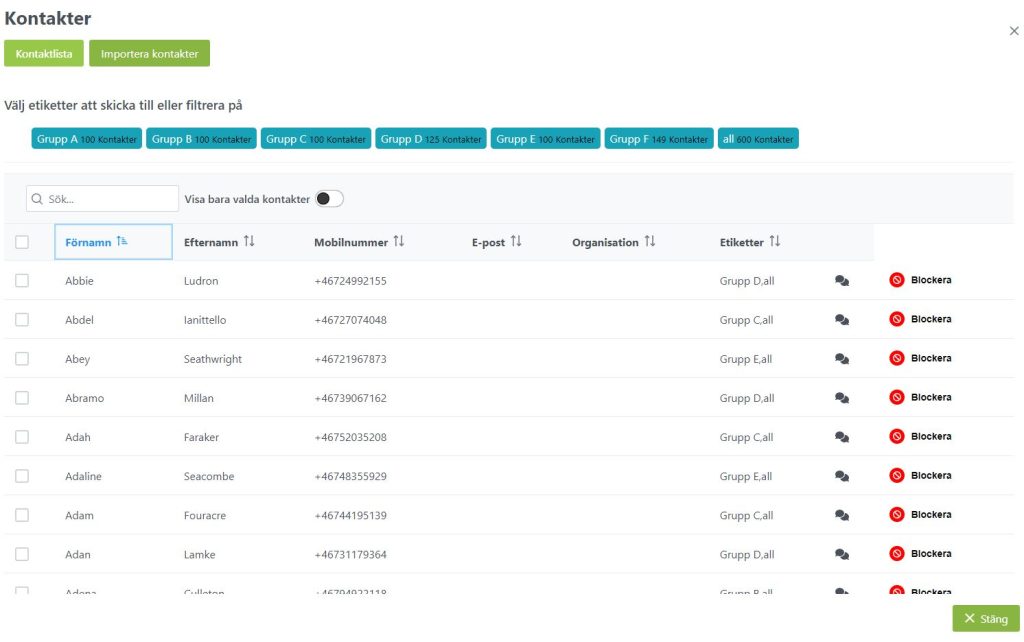
Contact list
The Contact List button takes you directly to the separate Contacts app where you get full control over your contacts and labels.
Import contacts
The import button takes you directly to the separate contacts app's import wizard, where you can import contacts from Excel or comma separated file (.csv) or from our legacy contact system.
Labels
Your available labels are displayed here. Click on a label to get the choice to add all contacts to the recipient list or to filter the contact table by available contacts.
The contact table
All contacts are shown here. You can choose to filter the contact table by labels or by the contacts that are added to the recipient list.
Sort – Click the sort icon above any table column to sort the table.
Conversations - Click on the chat bubbles for conversations to see the incoming and outgoing traffic for each contact.
Block - Click on block contact to add the contact's number to your blacklist, which means that no SMS will reach the contact. If the contact is already blocked, the button is replaced by an unblock button.
Import contacts from the legacy contact system
Importing contacts from our older contact system to the new one is easy! Our import uide will automatically find your contacts and groups and convert them to the new standard. Watch the video that shows you how to do it, step by step.
How do I manage my SMS traffic in the new Web SMS?
Like the older version of Web SMS, you can easily manage both incoming and outgoing traffic and get an overview of the traffic in the SMS flow.
Each section is easily accessed using the sub-menu at the top as illustrated in the images below.
SMS flow
The flow of outgoing and incoming traffic in the new Web SMS is very similar to the flow in the older version. Here you can easily see your SMS traffic in a chronological flow.
Mark as read - By clicking mark as read, you and other users on the same account can keep track of which incoming messages have already been handled.
Respond – The Reply button allows you to insert the number from the incoming message directly into the To field for easier reply handling.
Forward - By clicking the "forward" button on an outgoing message, you insert the message text into the message field so you can quickly forward sent message texts to other recipients.
The inbox
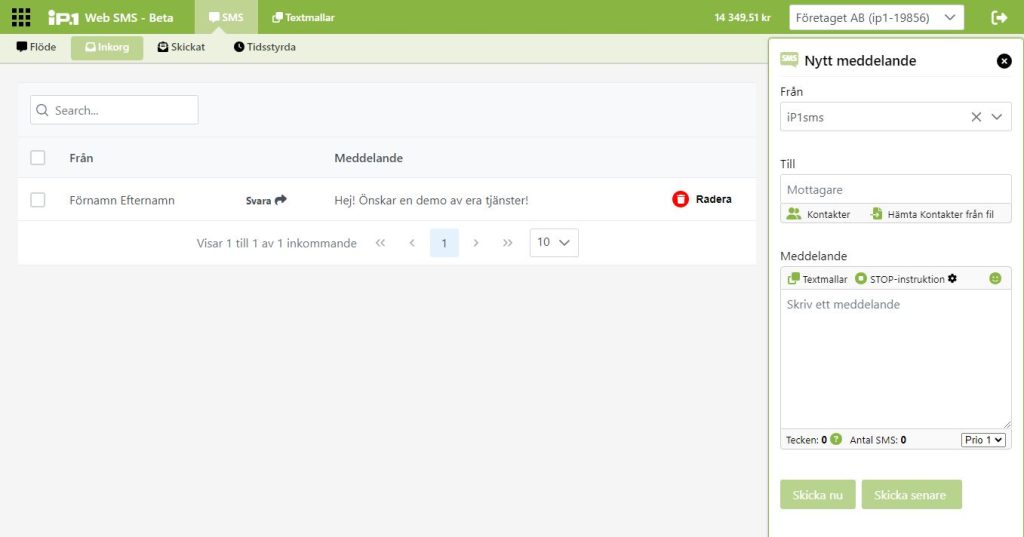
In the inbox you will find all incoming SMS in a table. The table is searchable and you can sort it like the contact table by using the arrows in any table column.
Respond - The reply button also allows you to insert the number from the incoming message directly into the to field, even from the inbox.
Delete - Click delete to delete a specific incoming message. When you delete a message, it disappears permanently.
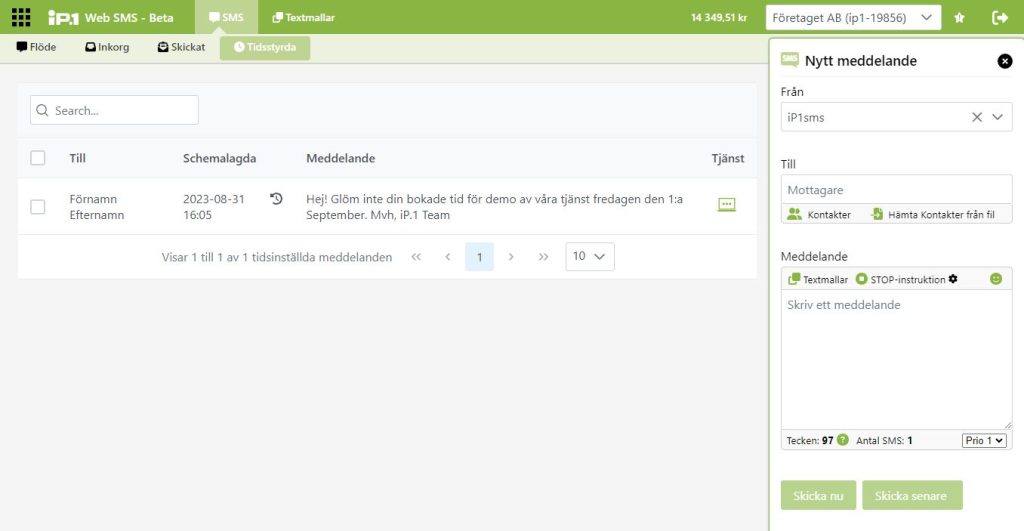
Timed SMS
In the view for timed SMS you will find a table with all timed SMS. Here you have the option to cancel or set a new time for your upcoming mailings.
Edit - By clicking on the small clock, you can change the timing of the dispatch.
Cancel time management - When you tick the check box in front of each planned mailing in the table, you have the option to cancel the mailing. When you have selected the messages you want, the "Cancel selected" button appears. Note that this cancels the shipment completely and cannot be undone.
How do I manage my text templates in the new Web SMS?
Streamline your SMS sendings with text templates in the new system, where you can easily organize your standard SMS texts.
In the new tree system, you can organize text templates in folders and thus get more structure when inserting them into the message field.
Overview
Here you manage your text templates, which you can then insert directly into the message field. The text templates work and can be used in our other services, such as One Channel.
Create a text template - Click on "create a new text template" to open the dialog box for new text templates.
Tree menu
The tree menu gives you an overview of your text templates and consists of folders which contains text templates
